If you are a PHP developer who used to work with Microsoft technologies in the past, you would undoubtedly miss its Visual Studio editor with full debug support: F5 to run the debugger, F6 to step next, F7 to step into, F8 to step out, etc. It works like magic.
Do you miss it? I certainly do.
The good news is that there are a few open-source tools out there that can give PHP developers the same debugging experience.
A Brief History of PHP Debugging
Whenever we talk about PHP debugging, one thing always comes to mind: XDebug. I would not dream of coding anything in PHP without it. But it was a different story before.
Remember PHP var_dump()? It was the only tool of the trade when debugging PHP back in the day.
The first thing was to turn on display_errors. We would do this either in the php.ini file or at the beginning of the code:
ini_set('display_errors', 'On');
error_reporting(E_ALL);
We would also have indeed relied on our handy dandy echo command to watch variable values and then painstakingly remove them once done. It was pretty much how all PHP applications were troubleshot back then.
Enter XDebug.
XDebug is a PHP extension that provides debugging capabilities for programming IDE. It was first released in May 2002 by Derick Rethans. XDebug has become the de facto standard as it is the only debugging tool in existence for PHP. Thank you, Derick! My life has never been the same.
What can Xdebug do
- Set/Remove breakpoints
- Perform an automatic stack trace
- Set a manual variable watch
- Enable function call logging
- Enable profiling
- Allow remote debugging
How to Install XDebug
XDebug is essentially a file (an .so file on Linux and a .dll on Windows) that you must install on your server.
Before the install, I suggest starting with the XDebug installation wizard. It does an outstanding job of probing your PHP environment, then gives you tailored installation instructions.
To configure PHP to use XDebug, add the following in your php.ini.
zend_extension=path/to/xdebug
Finally, to enable debugging, enter the following in your php.ini
[XDebug]
xdebug.remote_enable = 1
xdebug.remote_autostart = 1
Install XDebug From Your Mac
If you are on a Mac, the preferred technique is to use PECL command
pecl install xdebug
I’m going to share a little trick I use to install XDebug on a Mac. Here’s the one-liner in OSX that enables the PHP XDebug extension.
sudo sh -c 'echo zend_extension=$(find /usr/lib/php/extensions -name "xdebug.so") >> $(php -qr "echo php_ini_loaded_file();") && apachectl restart
This command does the following :
- Finds the native Xdebug extension that comes with Xcode
- Asks PHP which config file is loaded
- Adds the Xdebug extension path to the config file
- Restarts Apache.
Read the official XDebug installation guide: https://xdebug.org/docs/install
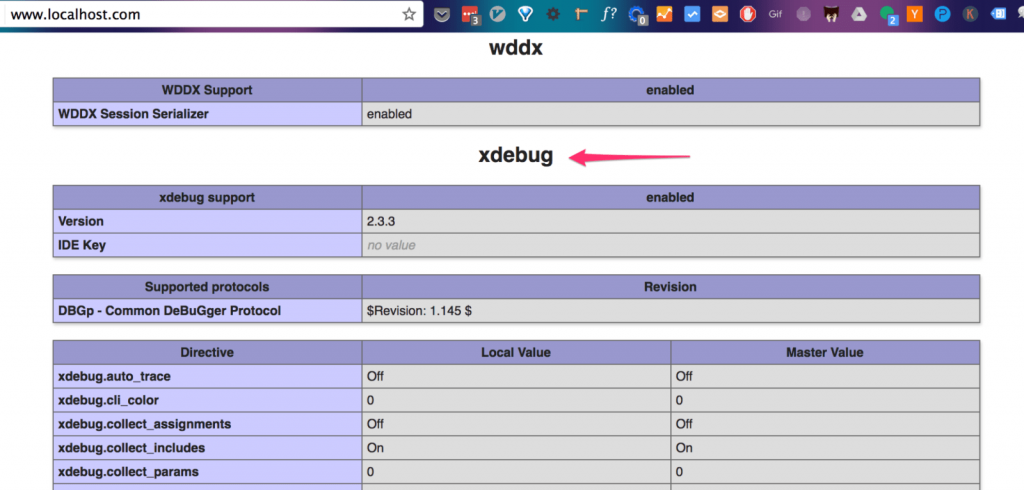
Finally, verify the installation by checking XDebug section in phpinfo() output.
XDebug in Visual Studio Code
Visual Studio Code is a free, open-source, cross-platform lightweight code editor. It is available for Windows, Linux, and OS X. You can download it here.
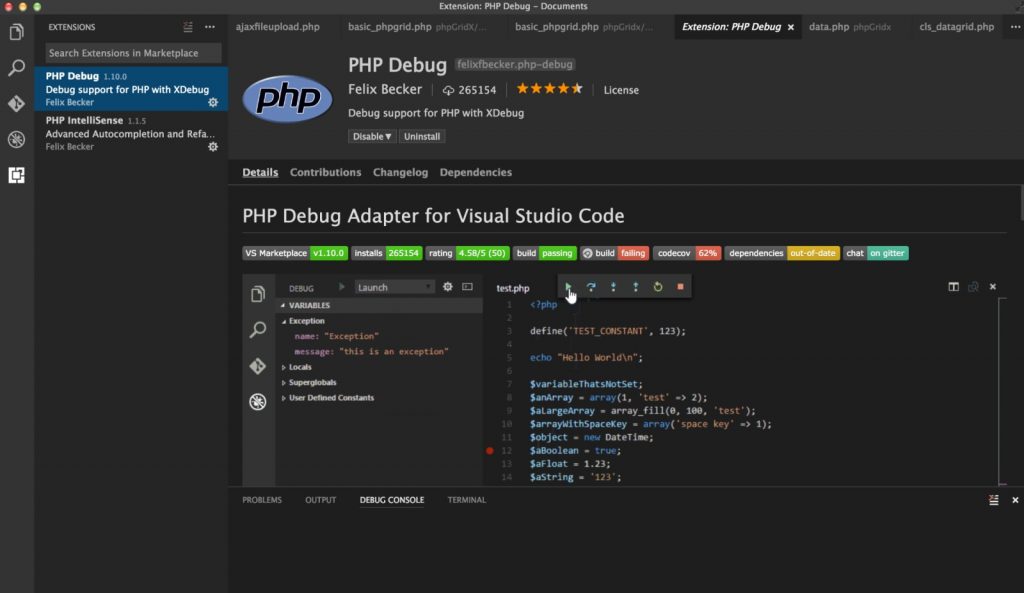
Now that we should have already installed XDebug on our server, we need to get the debug client installed in VS Code to set the breakpoints in the code that will be hit when PHP is processing the request. To do this, we need to get the “PHP Debug” Extension from VS Code. An easier way is to go to the Extensions tab, search for “PHP Debug”, and then click Install.
Once the installation is finished, be sure to restart VS Code before you start using it.
To add a breakpoint, click to the left of the line number once you have selected a line, press F9.
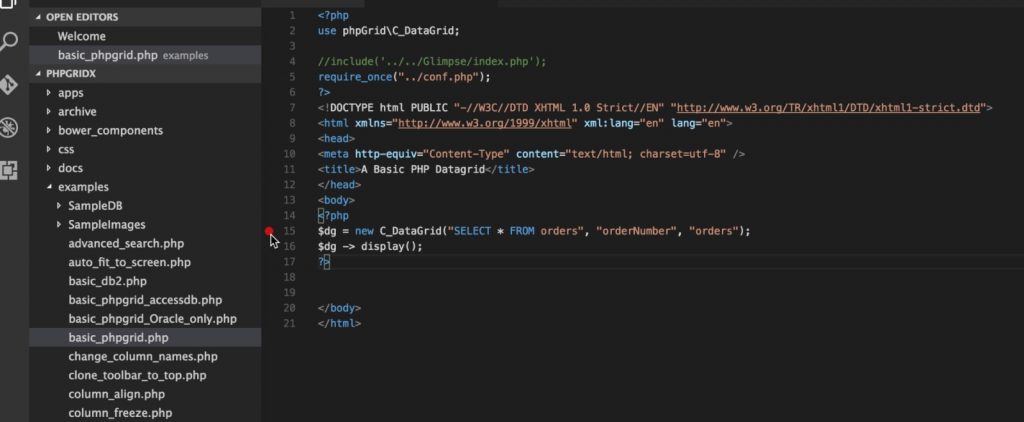
Then click the Debug icon on the left-side menu.
![]()
Be sure the “Listen to XDebug” option in the configuration dropdown is selected.

Finally, click the green “Play” icon or press F5 on the keyboard to start the debugging.

Now, open your web browser and visit the webpage where we set the breakpoints earlier. If everything has been set up correctly, as soon as the program hits the first breakpoint, you should be instantly switched back to VS Code.
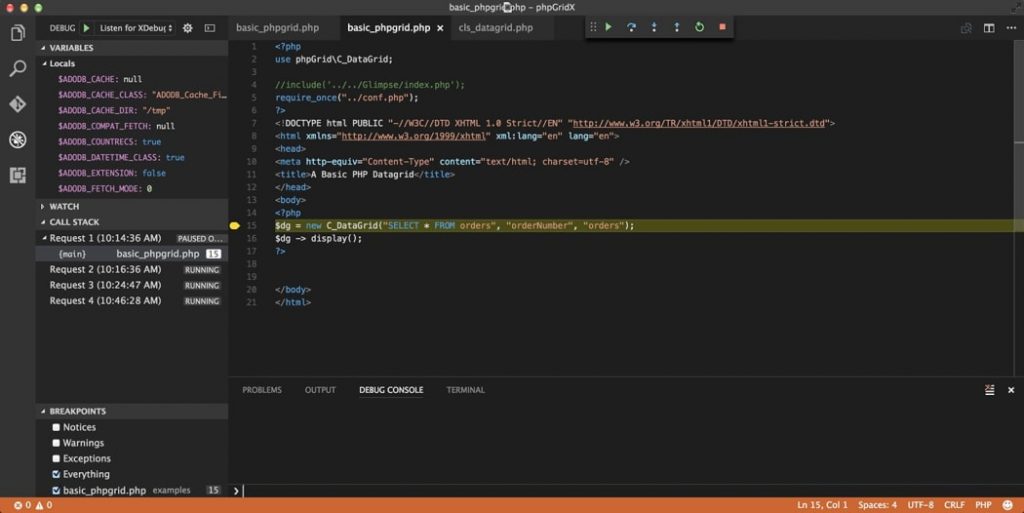
Now you can use the buttons in the debug bar to continue with debugging. Learn to use keyboard shortcuts! The highlighted yellow line indicates where execution stopped in our PHP script.
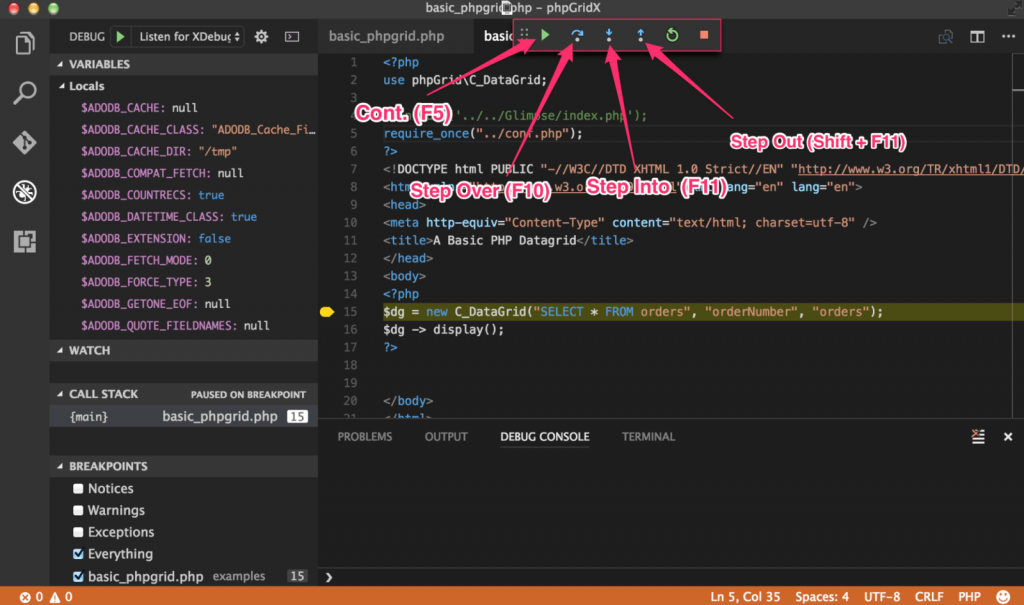
Pay close attention to the VARIABLES and CALL STACK on the left-hand pane. They are like having a dynamic PHP var_dump() command at your disposal.
For the demo, I set a single breakpoint on the following line,
$dg = new C_DataGrid("SELECT * FROM orders", "orderNumber", "orders");
In reality, you can set as many breakpoints as you need. To STEP OVER to the next breakpoint, press F10 on your keyboard; to STEP INTO the current line breakpoint, press F11.
Final Thoughts
Visual Studio Code provides excellent PHP language support right out of the box. Debugging PHP with VS Code is surprisingly smooth. My first time debugging was like debugging C# in the good old days. Step in, out, over, watch, etc., all work like a charm!
One of the things I’ve discovered is that where you put breakpoints for scripts inside MVC, such as Laravel and Yii, can be tricky. In my experience, the best place to set breakpoints is inside the model where all database operations take place. Step-in doesn’t always work when debugging in MVC due to its routing mechanism.